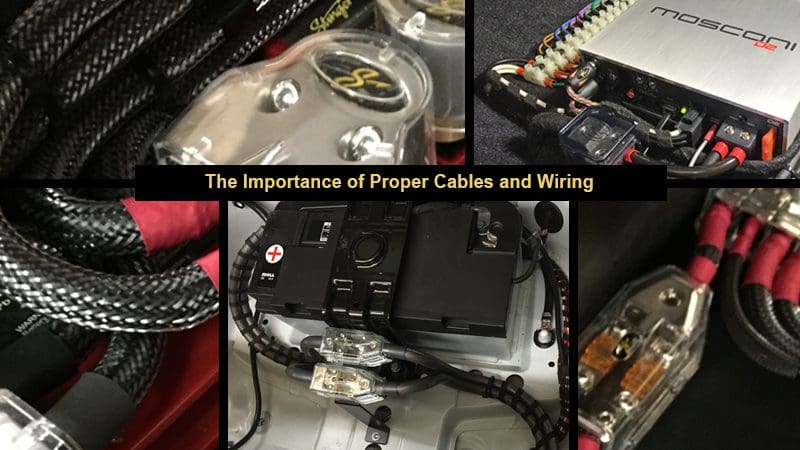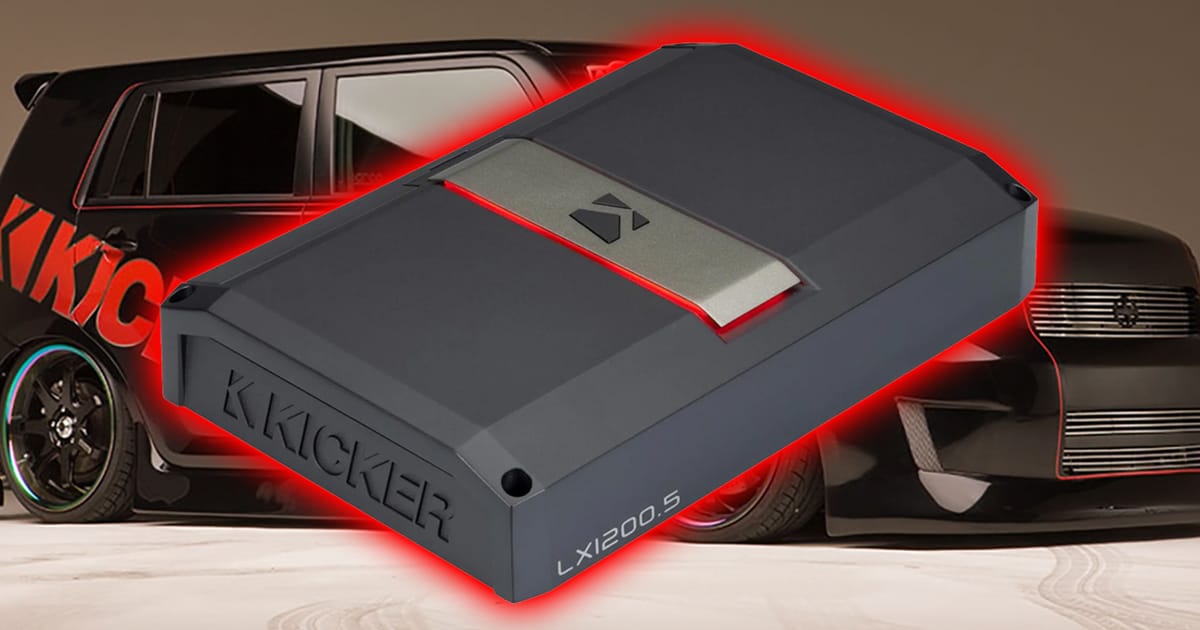
If you’ve been paying attention, then you’ll know that DSP-equipped car audio amplifiers are pretty common these days. KICKER introduced a new series of amplifiers called LX. These beasts are not only packed with serious power production capabilities, but they include digital signal processing and a unique configuration solution that separates them from everything else on the market. We’ll focus on the five-channel LX1200.5 in this Product Spotlight.
What is the KICKER LX1200.5 Amplifier?
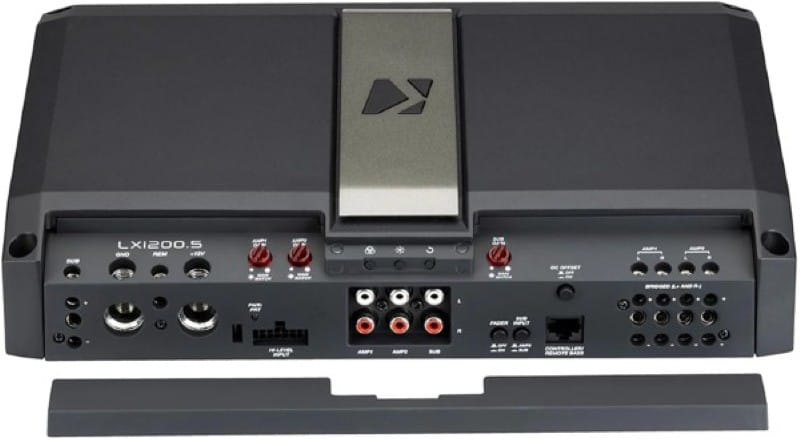
The KICKER LX1200.5 is a five-channel amp with an integrated digital signal processor. The amp is based on a cast aluminum chassis that measures 12.625 inches in length, 8.875 inches in width and stands 2.375 inches tall. All the connections are hidden under a removable panel along the long edge of the amp. The panel is held in place with magnets for a clean and tidy appearance. Wire connections are made via terminal blocks with heavy-duty set screws. Interestingly, there are only three controls on the amp, which are gains for the subwoofer, AMP1 and AMP2 channels.
Power-wise, KICKER rates the output of AMP1 and AMP2 at 125 watts per channel into four-ohm loads and 175 watts per channel when driving two-ohm loads. The channel pairs can be bridged to provide 350 watts into a single four-ohm load. The subwoofer channel produces 300 watts into a four-ohm load, 550 watts into two ohms and an impressive 700 watts when driving a one-ohm load. All specifications include the 14.4-volt, less than 1% THD+N qualifications, so you know they are comparable to other quality brands. The amplifier’s signal-to-noise ratio is greater than 75 dB, referencing one watt of output into a four-ohm load.
OEM Audio Integration
The KICKER team knows that many amplifier installations in modern vehicles use factory-installed source units. This means the amplifiers need to accept speaker-level signals. The LX1200.5, like other models in the LX Series includes fully differential speaker inputs that can take up to 40 volts of signal without needing an external interface. In low-level mode, the preamp inputs accept up to 5 volts.
The amplifier also has two turn-on modes. The amp can be activated with the typical 12-volt signal from an aftermarket source unit or switched to DC offset detection to monitor the speaker wires for a voltage from a factory radio. KICKER calls this their FIT+ technology.
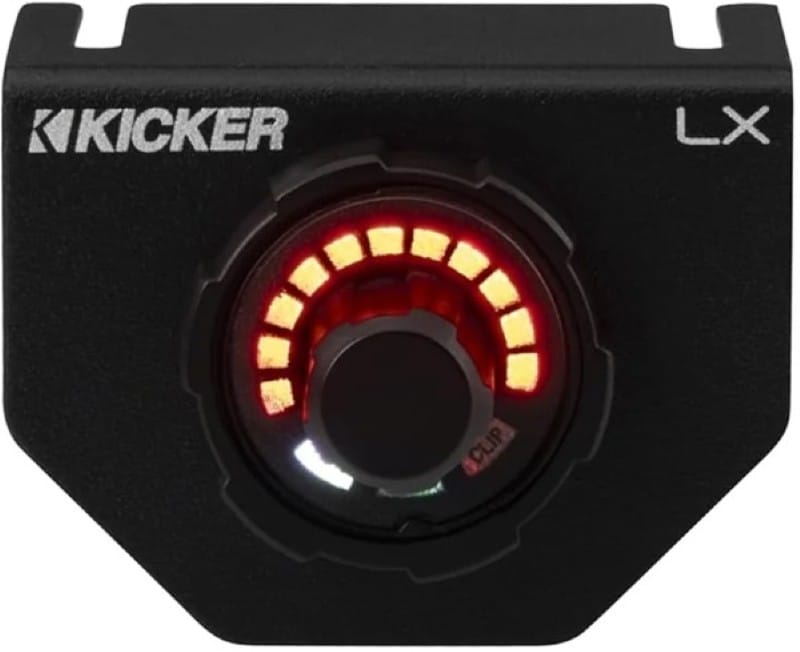
Speaking of integration, the LX amplifiers have input gain matching LEDs that illuminate when you have reached the maximum output capabilities of the amplifier.
Integrated Digital Signal Processing
Unlike most DSP-equipped amplifiers on the market that require a laptop or tablet to set up, KICKER includes a controller with the amp called the LX Control Center. This compact controller features a two-line LCD screen, four rotary encoders and buttons to access different amp channels and functions.
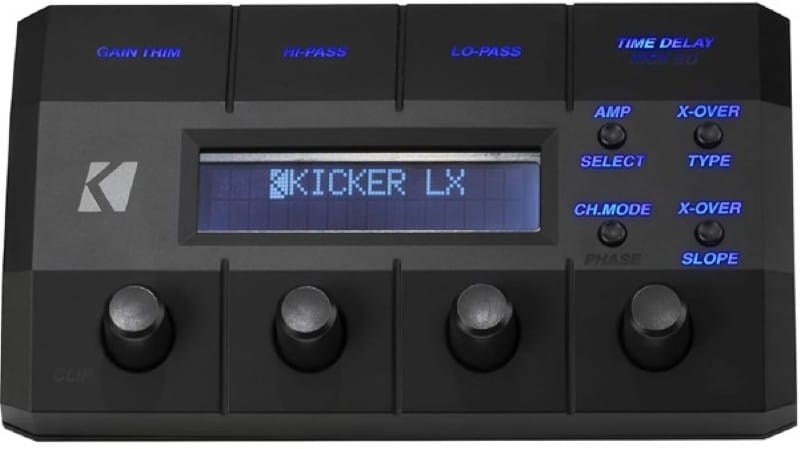
In terms of signal processing, your installer can apply high-pass, low-pass or band-pass crossover to each of the three channels on the amp. The high-pass filters are adjustable from 20 Hz to 5 kHz and the low-pass from 40 Hz to 5 kHz. Slopes can be set to 12 or 24 dB Linkwitz-Riley alignments or 12, 18 or 24 dB/octave Butterworth. You’ll want to use the Linkwitz alignment so you can set the crossover points at the same frequencies. The subwoofer channel low-pass filter is adjustable from 20 to 160 hertz and there is an infrasonic filter that can be set from 10 to 80 Hz to control subwoofer cone excursion.
KICKER includes a signal delay for the left channels on both AMP1 and AMP2. Your installer can delay the output of the left channels, which correlate to the speakers closest to the listening position in 0.1 millisecond steps, up to a maximum of 10 milliseconds. When set properly, adding delays to the closer speakers can help improve imaging and staging.
The subwoofer channel has a parametric equalizer that can be set between 20 and 80 hertz with a Q factor between 1 and 5 and a maximum gain of 6 dB. If you want to add a little Kick, no pun intended, this is the perfect solution. The LX amps also include SHOCwave 2.0. This feature analyzes audio information and creates a harmonic one octave below the fundamental to restore audio information lost by many factory-installed amplifiers. If you want to rumble, SHOCwave 2.0 can do it!
Once your installer is done setting up the amp, the LXCC (LX Control Center) can be disconnected from the RJ45 port, and the included LX Remote Control (LXRC) can be plugged in. This multifunction remote controls the subwoofer level and SHOCwave 2.0 functionality and even shows battery voltage using the LEDs around the perimeter.
Full Amplifier Family
The new LX series from KICKER includes the LX1200.5 five-channel we’ve discussed, a seven-channel LX1300.7 and the monster LX3000.1 3000-watt monoblock in the same chassis size. The LX series includes a four-channel LX500.4 and LX850.1, LX1250.1 and LX1300.7 in a smaller 9.625-inch long chassis. The width and height of all the amps are the same, so mixing and matching models is easy.
Speaking of design flexibility, the little illuminated badge in the center of the amp can be rotated 180 degrees to align with however your installer configures the amps in your vehicle.
Upgrade Your Car Audio Experience with KICKER LX-Series Amplifiers
If you are shopping for an impressively featured, high-performance amplifier for your car audio system, drop by a local authorized KICKER retailer and ask about the new LX series models, like the LX1200.5. They can design a system around these products, integrate it into your vehicle and configure it to sound amazing.
You can find an authorized retailer using the locator tool on the KICKER website. Be sure to follow the KICKER on Facebook, Instagram and YouTube. Check out the KICKER Unmasked LIVE show for weekly updates on new products and their unique technologies.
This article is written and produced by the team at www.BestCarAudio.com. Reproduction or use of any kind is prohibited without the express written permission of 1sixty8 media.