5Sixty3 Sound

Dubuque's only High Quality Car Audio and Electronics Retailer and Installation Facility

3366 Center Grove Drive - Suite 4 - Dubuque, IA 52003 563-239-1931
  • Home
  • Services
    • Car Audio
    • Custom Installation
    • Marine Audio
    • Remote Starters
    • Safety Cameras
  • Brands
    • Audio Dynamics
    • Under Construction
  • About Us
  • Location
  • Contact Us
  • Facebook

Acoustic Suspension Subwoofer Enclosures Explained

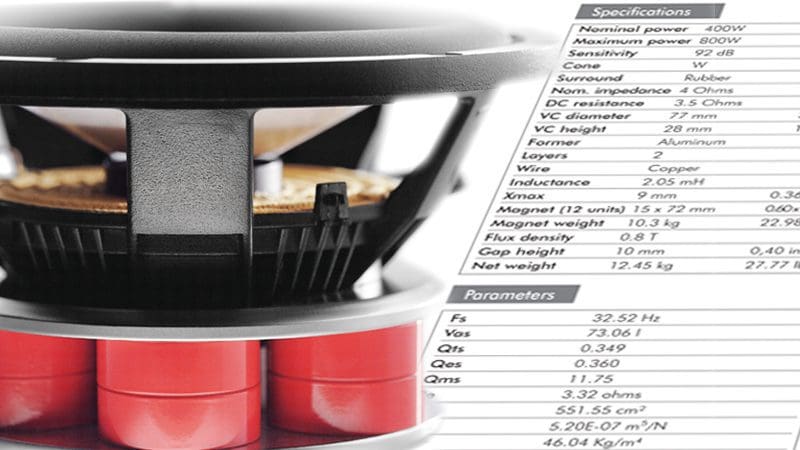
Acoustic SuspensionEnclosure, box or cabinet: Whatever you want to call them, where you install your speaker or subwoofer is critically important to their resulting performance. In this article, we focus on the simplest and most forgiving of enclosures to design and construct – the acoustic suspension or sealed enclosure.

The Laws of Physics

There are a few characteristics to keep in mind about every speaker. The first is that as frequency decreases, cone excursion increases. In fact, to produce the same acoustic output, a speaker must move four times as far for every halving of frequency. As an example, if your subwoofer were moving 1 mm at 80 Hz, it would have to move 4 mm to produce the same output at 40 Hz. To produce the same output at 20 Hz, it would have to move 16 mm.

Acoustic SuspensionA speaker includes an element called a spider. The spider stores energy when the voice coil of a speaker moves the cone forward or rearward from its resting position. When the cone reaches the end of its travel and comes to a stop, the stored potential energy in the spider wants to be released. This stored energy pulls the cone in the opposite direction. Each transfer of energy includes some losses, and eventually, the cone comes to rest.

Think of the cone motion like a swing at the park. You exert a force on the swing to get it started, and it continues to swing back and forth with a decreasing amplitude until it comes to a stop. Thankfully, a speaker stops moving a lot faster than the swing at the park.

In a speaker, this transfer of energy from the cone to the spider and back is most efficient at a specific frequency. We call this the resonant frequency of the speaker. At the resonant frequency, there is a dramatic increase in impedance because the spider stores a great deal of energy. This energy storage causes the cone to want to continue to move. The movement of the voice coil moving through the magnetic field generates a voltage. This voltage generates a flow of current in the opposite direction to the current flowing from the amp. We represent this opposition to current flow as an increase in impedance.

Acoustic Suspension
This graph shows the impedance rise around the resonant frequency of a 12-inch subwoofer in enclosures with a Qtc of 0.85, 1.0, 1.1 or 1.25.

We also have to consider that every speaker is limited in how far the cone can move. Once we exceed the excursion limitations of the speaker, bad things happen. The voice coil former can hit the back plate. The suspension components may be compromised and start to fail. As a by-product of the cone, dust cap, surround, spider and motor geometry, harmonic distortion also increases as excursion increases.

Our goal in designing any audio system should be to keep distortion as low as possible. Most of the distortion at low frequencies is resonance. These resonances decrease as we move above the resonant frequency of the speaker. The spider and the changing motor force, as the coil moves past the edge of the gap, are the biggest contributors to distortion.

Why Do We Need an Enclosure?

Let’s consider a few additional characteristics. The low-frequency roll-off of a speaker is a high-pass filter. The spider in the speaker is like a capacitor—a spring stores energy and so does a capacitor. The air inside the box is also a spring, and it is in parallel with the spider. The air spring and the spider work together at the same time to do the same thing. The combination of the air spring and the spider increases the high-pass filter frequency. Yes: Contrary to our efforts to produce as much low-frequency information as possible, an enclosure limits low-frequency reproduction.

If that is the case, why do we want to limit cone motion? Consider what we’ve said about how much excursion is required to reproduce low frequencies and about distortion. Limiting low-frequency output from our speaker is not an ideal goal, but limiting some of the really low frequencies to get the right amount of bass at higher frequencies is worthwhile.

Acoustic Suspension
This graph shows the increase in energy output as the Q-factor of the enclosure for this 12-inch subwoofer increases. The volume of the enclosure decreases and the Q-factor increases.

There is a benefit to increasing the resonant frequency of the speaker and enclosure system. Let us say we have a subwoofer with a Q of 0.5 and it is our goal to have a total system Q of 0.707. We choose an enclosure air volume that increases the Q, which then increases the system output at the new resonant frequency. Yes, we sacrifice output at lower frequencies, but we gain output around the new system resonant frequency.

I Want More Bass!

Acoustic Suspension
The King of the Hill is the 15″ subwoofer.

Modern speaker designs continue to reduce distortion through computer simulation and modeling of material behavior. Qualified and properly equipped speaker designers can simulate spider, cone and surround behavior to analyze individual resonance and distortion behaviors. They also can model the interaction between the voice coil and the motor structure to predict changes in magnetic field strength and inductance that can further affect how a speaker will sound at moderate to high excursion levels.

These advancements have resulted in speakers that produce less distortion at higher excursion levels. This improvement in performance allows enclosure designers to build speaker systems that will play lower and louder.

Some basic principles govern low-frequency sound reproduction. Cone area is critical. An old article published by the Audio Engineering Society called “The Problem with Low-Frequency Reproduction,” by Saul J. White, included a graph that compared cone excursion vs. frequency vs. system output for a 12- and 15-inch loudspeaker. In the chart, it shows that a 15-inch driver cone only has to move half as much as a 12-inch driver to produce the same output.

To produce sound, we need to displace air. Displacement is calculated by the product of speaker cone area times the distance the cone can travel. In other words, bore times stroke. For the same displacement, more bore requires less stroke.

What is the punch line? If you want it louder, buy more speakers or subwoofers.

Driver Behavior in an Enclosure

The increase in the system Q caused by the addition of air stiffness in the enclosure can cause distortion if the Q is increased excessively. This increase in Q works against our desire for a low-distortion system. Making the enclosure too small increases the Q too much, and we wind up with a system that produces a great deal of output in a narrow frequency range. These undersized enclosures are often referred to as a “one-note-wonders.”

What causes this behavior? The one-note quality is a result of the increased energy storage and transference in the resonant system. The bass just keeps going and going – like our swing at the park.

Power Handling

In an acoustic suspension enclosure, cone excursion increases as frequency decreases. This increase in excursion continues down to the frequency at which the force of the spider and the box exceeds the force of the motor. At that point, the excursion level is limited, and we will not see the increase in excursion . The result: We protect the speaker from physical damage due to cone excursion beyond the design characteristics of the speaker.

Predicting the limits of cone excursion relative to frequency and power is relatively simple for a sealed enclosure. The volume of the enclosure is inversely proportional to the amount of power the speaker can handle when perceived from the standpoint of excursion. A small enclosure limits cone excursion a great deal at very low frequencies, but the system does not produce a lot of deep bass. A large enclosure allows the speaker to move further and produce more low-frequency output, but we cannot drive the speaker with as much power for fear of damaging it.

Acoustic SuspensionAs we increase the volume of the subwoofer enclosure, the air inside has less “spring effect” on the subwoofer’s motion. This graph shows the increase in driver excursion as air volume increases in four different enclosures.

Acoustic Suspension Overview

An acoustic suspension speaker enclosure reduces bass output at a rate of -12 dB per octave below the resonant frequency. When you combine this roll-off with the cabin gain associated with most vehicles, you can get excellent and linear low-frequency extension well into the infrasonic region. Acoustic suspension enclosures are easy to calculate and to construct. They are very forgiving of minor errors in volume calculation.

Finally, it is worth remembering that acoustic suspension enclosures are not the lowest-distortion enclosure designs available.

When it comes time to design a subwoofer enclosure for your car or truck, visit your local mobile electronics retailer and discuss your requirements. They can help you choose a subwoofer and enclosure design that will give you a solid foundation on which to build your audio system.

This article is written and produced by the team at www.BestCarAudio.com. Reproduction or use of any kind is prohibited without the express written permission of 1sixty8 media.

Filed Under: RESOURCE LIBRARY, ARTICLES, Car Audio

Product Spotlight: KICKER LX1200.5

ICKER LX1200.5

If you’ve been paying attention, then you’ll know that DSP-equipped car audio amplifiers are pretty common these days. KICKER introduced a new series of amplifiers called LX. These beasts are not only packed with serious power production capabilities, but they include digital signal processing and a unique configuration solution that separates them from everything else on the market. We’ll focus on the five-channel LX1200.5 in this Product Spotlight.

What is the KICKER LX1200.5 Amplifier?

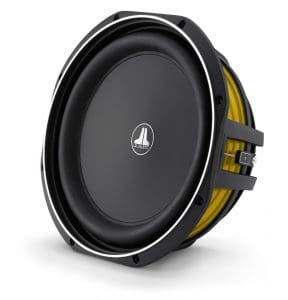
The KICKER LX1200.5 is a five-channel amp with an integrated digital signal processor. The amp is based on a cast aluminum chassis that measures 12.625 inches in length, 8.875 inches in width and stands 2.375 inches tall. All the connections are hidden under a removable panel along the long edge of the amp. The panel is held in place with magnets for a clean and tidy appearance. Wire connections are made via terminal blocks with heavy-duty set screws. Interestingly, there are only three controls on the amp, which are gains for the subwoofer, AMP1 and AMP2 channels.

Power-wise, KICKER rates the output of AMP1 and AMP2 at 125 watts per channel into four-ohm loads and 175 watts per channel when driving two-ohm loads. The channel pairs can be bridged to provide 350 watts into a single four-ohm load. The subwoofer channel produces 300 watts into a four-ohm load, 550 watts into two ohms and an impressive 700 watts when driving a one-ohm load. All specifications include the 14.4-volt, less than 1% THD+N qualifications, so you know they are comparable to other quality brands. The amplifier’s signal-to-noise ratio is greater than 75 dB, referencing one watt of output into a four-ohm load.

ICKER LX1200.5
To keep the installation tidy, signal, speaker and power connections are all made along one side of the amp.

OEM Audio Integration

The KICKER team knows that many amplifier installations in modern vehicles use factory-installed source units. This means the amplifiers need to accept speaker-level signals. The LX1200.5, like other models in the LX Series includes fully differential speaker inputs that can take up to 40 volts of signal without needing an external interface. In low-level mode, the preamp inputs accept up to 5 volts.

The amplifier also has two turn-on modes. The amp can be activated with the typical 12-volt signal from an aftermarket source unit or switched to DC offset detection to monitor the speaker wires for a voltage from a factory radio. KICKER calls this their FIT+ technology.

Speaking of integration, the LX amplifiers have input gain matching LEDs that illuminate when you have reached the maximum output capabilities of the amplifier.

Integrated Digital Signal Processing

Unlike most DSP-equipped amplifiers on the market that require a laptop or tablet to set up, KICKER includes a controller with the amp called the LX Control Center. This compact controller features a two-line LCD screen, four rotary encoders and buttons to access different amp channels and functions.

ICKER LX1200.5
Each amplifier includes an LX Control Center (LXCC) to let your installer configure the amp quickly and easily.

In terms of signal processing, your installer can apply high-pass, low-pass or band-pass crossover to each of the three channels on the amp. The high-pass filters are adjustable from 20 Hz to 5 kHz and the low-pass from 40 Hz to 5 kHz. Slopes can be set to 12 or 24 dB Linkwitz-Riley alignments or 12, 18 or 24 dB/octave Butterworth. You’ll want to use the Linkwitz alignment so you can set the crossover points at the same frequencies. The subwoofer channel low-pass filter is adjustable from 20 to 160 hertz and there is an infrasonic filter that can be set from 10 to 80 Hz to control subwoofer cone excursion.

KICKER includes a signal delay for the left channels on both AMP1 and AMP2. Your installer can delay the output of the left channels, which correlate to the speakers closest to the listening position in 0.1 millisecond steps, up to a maximum of 10 milliseconds. When set properly, adding delays to the closer speakers can help improve imaging and staging.

The subwoofer channel has a parametric equalizer that can be set between 20 and 80 hertz with a Q factor between 1 and 5 and a maximum gain of 6 dB. If you want to add a little Kick, no pun intended, this is the perfect solution. The LX amps also include SHOCwave 2.0. This feature analyzes audio information and creates a harmonic one octave below the fundamental to restore audio information lost by many factory-installed amplifiers. If you want to rumble, SHOCwave 2.0 can do it!

Once your installer is done setting up the amp, the LXCC (LX Control Center) can be disconnected from the RJ45 port, and the included LX Remote Control (LXRC) can be plugged in. This multifunction remote controls the subwoofer level and SHOCwave 2.0 functionality and even shows battery voltage using the LEDs around the perimeter.

ICKER LX1200.5
The included LX Remote Control (LXRC) is much more than just subwoofer level control.

Full Amplifier Family

The new LX series from KICKER includes the LX1200.5 five-channel we’ve discussed, a seven-channel LX1300.7 and the monster LX3000.1 3000-watt monoblock in the same chassis size. The LX series includes a four-channel LX500.4 and LX850.1, LX1250.1 and LX1300.7 in a smaller 9.625-inch long chassis. The width and height of all the amps are the same, so mixing and matching models is easy.

Speaking of design flexibility, the little illuminated badge in the center of the amp can be rotated 180 degrees to align with however your installer configures the amps in your vehicle.

Upgrade Your Car Audio Experience with KICKER LX-Series Amplifiers

If you are shopping for an impressively featured, high-performance amplifier for your car audio system, drop by a local authorized KICKER retailer and ask about the new LX series models, like the LX1200.5. They can design a system around these products, integrate it into your vehicle and configure it to sound amazing.

You can find an authorized retailer using the locator tool on the KICKER website. Be sure to follow the KICKER on Facebook, Instagram and YouTube. Check out the KICKER Unmasked LIVE show for weekly updates on new products and their unique technologies.

This article is written and produced by the team at www.BestCarAudio.com. Reproduction or use of any kind is prohibited without the express written permission of 1sixty8 media.
Filed Under: ARTICLES, Car Audio, PRODUCTS, RESOURCE LIBRARY Tagged With: KICKER

The Importance of Proper Cables and Wiring

WiringInstalling mobile electronics systems is not as easy as it used to be. In the “good old days,” cars were made from thick metal and didn’t have many electrical components. Modern vehicle construction makes use of the thinnest, lightest materials possible. These body panels are held together with non-conductive adhesives, and it seems that every square inch of our cars and trucks are packed with computers, sensors and modules. Even a task as simple as wiring an amplifier can become quite complex.

In this Best Car Audio article, we look at the importance of proper wiring techniques and materials, and the effect they have on the performance of an aftermarket audio system upgrade.

Power Delivery

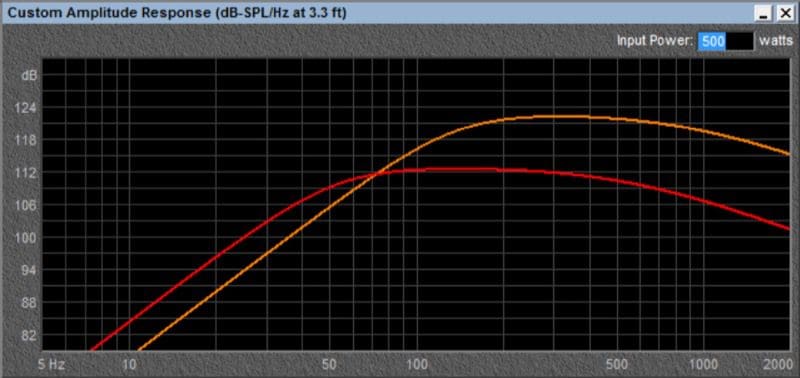
WiringThis article is about installing a five-channel amplifier in a vehicle with a factory head unit. There are two important tasks when it comes to installing an amp: getting a signal to it and getting power to it. For an amplifier to produce power, you need to feed it power. The primary source of power in our vehicles is the alternator, followed by the battery. Most people focus on running a large conductor from the positive terminal of the battery to the positive terminal of the amplifier. While this is important, where and how the amplifier is grounded is equally important.

Quality installers will know the best locations on a vehicle to make a ground connection. They will know how to handle a vehicle with an aluminum or composite chassis. They will know how to recognize vehicles that are assembled with adhesives instead of spot welds. If you are installing a large amplifier, they will know how to upgrade the factory wiring under the hood to handle the extra current draw.

Wiring
It is best practice to install the fuse as close to the battery as possible.

Protecting your vehicle is a part of installing power wire. In the unlikely event you get into an accident or something bad happens to your amplifier, the wiring and the equipment installed in your vehicle need protection in the form of a fuse. A good installer will install a fuse as close as possible to each source of power for the system. In most installations, this is near the main battery.

Some systems have secondary batteries and require additional fuses for proper protection. If you have the choice, a fuse provides better protection device than a circuit breaker. Fuses offer more surface area for power conduction. Also, there is absolutely no chance that a properly installed fuse could fail in a condition that may allow current to continue to pass.

Signal Integration

The audio systems in modern vehicles are becoming increasingly complex. Manufacturers (JBL, Infinity and Lexicon) are turning to suppliers like Bose and Harman for increasingly complex audio systems. Each of these companies employs highly trained engineers who spend months tuning each new system.

Wiring
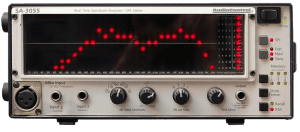
Technicians use an RTA to gain a visual representation of audio signals.

Trying to source an audio signal that will work with aftermarket equipment is becoming increasingly difficult at the same time. A properly trained installer will have the knowledge and experience to measure the signals in the factory system to determine if they can be used as is. If the signals are not acceptable in level, frequency response or bandwidth, your installer can recommend the correct component to correct them.

Your installer will also know to test each signal source across multiple functions. Ensuring that factory Bluetooth, navigation prompts and parking sensor warnings continue to work as intended is important to you being able to enjoy your upgraded audio system.

Noise Prevention

Wiring
Proper wire routing can help reduce the chance of radiated noise.

Dealing with factory computers, sensors, data networks and other high-current components can cause interference with the delicate low-level audio signals we send to our amplifiers. If you are not using good-quality interconnects that offer a twisted-pair design and appropriate shielding, you leave yourself open to picking up all sorts of strange noises. Likewise, choosing the right equipment is critical. You want to ensure that each component in the signal path has differential inputs to reject any noise that might be imposed on your interconnects, or the speaker wires running to the input of your amplifier.

The amplified signal coming from your amp is still subject to noise. Passive crossover networks can be notorious for picking up electromagnetic noise. Where your installer places the passive networks is quite important. An experienced installer knows what to avoid for your system to sound great and be noise-free.

Choice of Wiring Materials

Wiring
OFC wire is often tinned to help reduce surface oxidation.

There are two options for power and speaker wire – CCA and what most refer to as OFC. CCA stands for Copper Clad Aluminum. CCA typically is an inexpensive wire that is part aluminum and part copper. Aluminum costs less than copper, but it also does not conduct as well. You will usually see CCA wiring labeled with Gauge or GA when referencing its size. It is also worth noting that, unless the wiring you have chosen says AWG on it, there is no standard for the size of the conductor within the jacket.

Combine that with not knowing the ratio of copper to aluminum, and you run the risk of starving your amplifier for power. We have seen CCA 4 gauge wires that present almost four times the resistance as a proper 4 AWG conductor.

OFC stands for Oxygen-Free Copper. The term OFC has become the accepted slang term for all copper wiring. Properly sized copper wiring (using the AWG standard) offers the best possible power delivery to your amplifier.

Working on modern vehicles has its challenges, but those challenges come with rewards regarding background noise levels, convenience and features. Trust the installation of your audio equipment to qualified professionals. They have the experience to get the job done right the first time. Visit your local mobile electronics retailer to find out more.

This article is written and produced by the team at www.BestCarAudio.com. Reproduction or use of any kind is prohibited without the express written permission of 1sixty8 media.
Filed Under: RESOURCE LIBRARY, ARTICLES, Car Audio

Product Spotlight: Hertz Capri H100

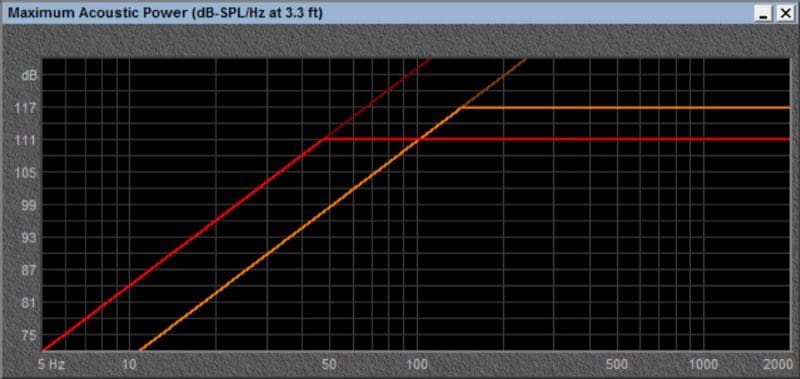
Though there are dozens, if not hundreds, of marine source unit options on the market, very few are designed with audio performance as their primary consideration. To this end, the Hertz Capri H100 features support for modern high-resolution audio file playback and premium Bluetooth streaming connectivity. Combined with a large color display, this is the marine source to consider for those who care about sound quality. Let’s check it out!

Hertz Capri H100 Design and Features

The H100’s focal point is its large 4.3-inch color TFT IPS display. The In-Plane Switching (IPS) technology dramatically improves off-axis viewing clarity to ensure the displayed information is visible even when the radio is mounted at an angle. Aside from the usual audio source information display, the Capri has a camera input that could help with docking a larger boat.

A rotary volume encoder is located on the left side of the front panel, making control easy and intuitive. Rubberized buttons above and below the control handle source selection, track selection and menu access.

The H100 radio has a slender rear chassis and an oversized face. The face measures roughly seven inches wide and four inches tall. The cutout for the chassis needs to be six by 2.5 inches. The chassis will protrude about 5 inches behind the mounting surface. The front panel has an IP67 rating, so it can handle getting splashed without fear of water damage.

Hertz Capri H100
The H100 display features a high-quality color display and intuitive controls.

Source Options

The Capri H100 features an AM/FM receiver with tuner frequency spacing support for countries worldwide. RDS and RDBS information display is also supported, so you can see what track is playing, assuming the station broadcasts that information. The radio will also receive Weather Band information so you can stay up to date with the marine forecast in your area.

If you want the best sound quality from your entertainment system, you must start with the best source. Connecting a USB memory stick with FLAC, WAV or Vorbis files will deliver high-resolution audio playback. You can also play MP3, WMA or AAC files. The radio supports USB memory sticks up to 256 GB in size with as many as 9999 files on the stick.

The Capri H100 isn’t shy about inputs. First, there’s an RCA input that you can use with a media or DVD player. A TOSLINK S/PDIF input also supports 24-bit, 192 kHz audio streams.

Moving down the sound quality food chain takes us to Bluetooth. The Capri is state-of-the-art, supporting LDAC and aptX HD high-resolution formats. If your Android phone supports these transmission types, your music will sound better than the classic AAC protocol. You may have to dig into your phone’s menu to turn these all on. Those of us with an iPhone are stuck with AAC.

The H100 can be upgraded with a SiriusXM SXV300 tuner module and antenna if you want to enjoy genre-specific entertainment. This is a must-have in rural regions without terrestrial radio stations or cell service.

System Connectivity and Expansion

Let’s start by looking at the audio outputs. The built-in four-channel amplifier is rated to produce up to 70 watts of power when driving four two-ohm loads. Continuous ANSI/CTA-2006 compliant output is 26 watts per channel into four four-ohm loads.

The Capri H100 is a multi-zone radio with four sets of stereo and subwoofer RCA outputs rated for four volts RMS. Each stereo output has an optional high-pass filter that can be set to 60, 80 or 100 hertz. The subwoofer outputs have the same low-pass frequencies. There’s also an eight-band graphic equalizer for each of the four zone outputs. Your installer could configure a system for the helm, the main seating area, a front berth and the cabin.

The deck is part of Hertz and Audison’s Full DA HD ecosystem. As such, it features a coaxial S/PDIF output with support for 24-bit, 192 kHz digital audio. If you want to feed a digital signal processor with a clean signal, this connection has you covered.

Hertz Capri H100
The Capri H100 offers four zones of control to ensure everyone on your boat is entertained.

Remote Control Options

The Hertz Capri H100 can be upgraded with your choice of wired remotes to make controlling the radio from around a large boat easier. The optional Capri HD1 mimics the functionality of the main Capri H100 radio and includes the same controls and color display. If you want something more streamlined, the compact HMC U1 remote has source, volume and track selection buttons in a small chassis. The latter would be ideal for a swim platform where its compact size is a big feature.

An NMEA 2000 port on the back of the radio chassis allows you to connect the H100 to a multi-function display.

What you might not have seen coming is the Hertz Marine Control app for your Apple or Android smartphone. You have complete control over all four zones’ source options and volume levels when connected. Your installer can use the app to set crossover points and fine-tune the equalizers as mentioned earlier.

Hertz Capri H100
The Capri H100 includes a NMEA 2000 that lets you connect to a multi-function display at the helm.

The Heart of a Premium Marine Audio System

Whether you have a bowrider, wakeboard boat, or want a multi-zone audio system for your cruiser or yacht, the Hertz Capri H100 marine radio is the perfect solution. Combine it with high-quality speakers, amplifiers and subwoofers, and you have entertainment options that are perfect for an evening of dinner and drinks with friends or blasting around the lake with someone on the tow rope.

Visit the Hertz website and use their dealer locator tool to find an authorized retailer near you. While online, be sure to follow Hertz on Facebook, Instagram and, of course, YouTube.

This article is written and produced by the team at www.BestCarAudio.com. Reproduction or use of any kind is prohibited without the express written permission of 1sixty8 media.
Filed Under: RESOURCE LIBRARY, ARTICLES, Marine Audio, PRODUCTS Tagged With: Hertz

Car Audio Installation – The Good, Better, Best Approach

Car Audio InstallationInstalling mobile electronics in a vehicle is a balance of technical skill and creativity. From the seemingly simple task of connecting wires to the creation of a custom amp rack or subwoofer enclosure, each task requires the car audio installation technician to call upon many different skills. When it comes to installing audio gear in your car, many retailers offer packaged solutions at different performance levels for their clients – this is often called the Good, Better, Best approach. In this article, we look at a few examples where this approach is commonly applied and examine the benefits for each.

Door Speaker Installation

Car Audio Installation
A composite mounting ring and some sound damping put this install in the “Better” category.

It sounds simple, doesn’t it? Take off the factory door panel, unscrew a speaker, connect the new one, then screw it in place. Finish up by putting the door panel back on. For the average mobile electronics retailer, this would just barely qualify for a “Good” installation. With the speakers connected and installed, the installer typically will have a listen to the system before putting it all together to confirm all the wiring is correct. If you require a speaker adapter, the shop may offer to supply one made from painted wood or crafted from HDPE or ABS plastic. Always take the plastic adapter. Wood will swell up when it gets wet.

For those looking for a “Better” installation, several companies offer speaker mounting baffle rings. These are foam rings that surround the speaker and seal the mounting surface to the back side of the door trim panel. This ring can help with the transfer of sound energy into the vehicle and is likely to reduce the chances of buzzes and rattles. Your installer may also place a sheet of damping material behind the speaker – 12×12-inch pieces are common. This material helps to damp the metal to which the speaker is mounted and ensure there is no gap between the speaker and the mounting surface.

Car Audio Installation
This door speaker installation by our friends at Handcrafted Car Audio is a perfect example of a “Best” level job.

In a “Best” quality installation, the installer will cover the entire surface of the door in a high-quality damping material. Sealing up the access holes in a door panel can dramatically improve the low-frequency response and overall efficiency of the speakers you are having installed. In fact, money spent on proper damping offers a bigger gain in performance than an equivalent upgrade in the quality of speakers.

Several companies offer composite damping solutions that combine damping with a layer of closed-cell foam. This type of damping material offers a further reduction in buzzes and rattles, and improvement in sound absorption.

You may opt to have damping material installed on the outside door skin while the trim panel is off. Damping the outer door skin will further reduce the transfer of outside noise into your vehicle, making your audio system easier to enjoy. If you are using a moderate- to high-power amplifier, you may also opt to have new speaker wires run into the doors.

Subwoofer Enclosure

One of the first upgrades you should do to your audio system is to add a subwoofer. Almost every factory audio system, even one that includes subs, sounds anemic and weak.

Car Audio Installation
This custom-built enclosure by Sound Depot is a great example of a “Good” level subwoofer enclosure.

When it comes to the choice of subwoofer enclosure, the options are nearly limitless. The most basic of subwoofer enclosure solutions is to pick a pre-fabricated enclosure from a catalog, have your installer install the sub and plunk it in your vehicle. This solution doesn’t qualify for our standard of “Good”, but it works, and it’s better than not having a sub at all.

Choosing to have your retailer design an enclosure specifically for the subwoofer you have chosen and the exact space you require moves us up to the “Good” standard. The enclosure should be made of 3/4″ MDF and finished in a material that matches your vehicle. It should maximize the available room in your vehicle reasonably well.

The move to the Better level may take different directions, depending on your vehicle. Fiberglass or Stack-Fab enclosures can further maximize the available space in your vehicle. If constructed correctly, these enclosures can be more rigid thanks to additional bracing. This bracing results in better performance. At the “Better” level, your installer may choose to incorporate some cosmetic accents. Including a trim ring around the sub in an accent material is pretty common.

Car Audio Installation
Kingpin Car & Marine Audio provide an example of a “Best” level subwoofer enclosure.

At the “Best” level, the enclosure design will be topnotch! Your installer may even choose to measure the Thiele-Small parameters of your subwoofer before starting work. The enclosure will be extremely rigid and well-reinforced internally.

Your installer may choose to line or stuff the enclosure with materials like Dacron or foam. Cosmetics will also take a leap forward at this level. Having the enclosure trimmed flush to the sides of the vehicle is a must to make it look like it came from the factory. Your installer may choose to use vinyl or leather on the visible parts of the enclosure to further improve the match with factory styling. A product or vehicle brand or logo may be incorporated into the design as well. At the Best level, anyone who sees the resulting creation should be immediately impressed.

Design and Cost

There is no limit to how creative your installer can get with the installation – it’s all governed by how much you want to spend. At the higher end, the installer may provide drawings or sketches of the finished product. You will probably have to pay for this design time. That said, many shops will credit some or all of that back to you as part of the final cost.

The top installers around the country charge upwards of $100 per hour for custom work or more. Their experience and creativity allows them to be very efficient in executing their ideas, and the work behind the scenes is often equally exemplary. Attention to detail for wiring, product mounting with Nutserts or stainless steel hardware, and proficiency in system design and tuning are all part of getting the Good, Better or Best value for your money.

Visit Your Local Specialist For Car Audio Installation

When it’s time to go shopping, drop by a few of your local mobile electronics specialist retailers. They would be happy to show you different options for your project.

This article is written and produced by the team at www.BestCarAudio.com. Reproduction or use of any kind is prohibited without the express written permission of 1sixty8 media.
Filed Under: ARTICLES, Car Audio, RESOURCE LIBRARY

  • 1
  • 2
  • 3
  • …
  • 8
  • Next Page »

Recent Articles

Acoustic Suspension

Acoustic Suspension Subwoofer Enclosures Explained

August 3, 2025 

Enclosure, box or cabinet: Whatever you want to call them, where you install your speaker or subwoofer is critically important to their resulting performance. In this article, we … [Read More...]

KICKER LX1200.5

Product Spotlight: KICKER LX1200.5

July 11, 2025 

If you’ve been paying attention, then you’ll know that DSP-equipped car audio amplifiers are pretty common these days. KICKER introduced a new series of amplifiers called LX. These … [Read More...]

The Importance of Proper Cables and Wiring

The Importance of Proper Cables and Wiring

July 6, 2025 

Installing mobile electronics systems is not as easy as it used to be. In the “good old days,” cars were made from thick metal and didn’t have many electrical components. Modern … [Read More...]

Hertz Capri H100

Product Spotlight: Hertz Capri H100

July 4, 2025 

Though there are dozens, if not hundreds, of marine source unit options on the market, very few are designed with audio performance as their primary consideration. To this end, the … [Read More...]

Testimonials

Dream Center

Very happy! 4 remote starts installed in 4 hours

Friendly and knowledgeable service!

We went in not knowing where to start on our electrical issues with a new vehicle. Not only was the issue identified and fixed, but Lee explained how things worked so we could understand now and in the future. We also got two sound systems installed and could not be happier. Would recommend 5sixty3 to anyone looking for quality work to be done on a vehicle!

Ford Ranger Trim Package

Lee and his company are not something I would have ever expected to find in Dubuque. His work is top notch. His knowledge is unmatched. His professionalism is just not something you see every day. I will be back with my next project!

Now Available!

Audio Dynamics

Audio Dynamics

At 5sixty3 Sound, we’re committed to bringing you the best in car audio, and that’s why we’re proud to offer the full line of Audio Dynamics … LEARN MORE

Location


Get Directions to 5Sixty3 Sound

Find Us

5Sixty3 Sound

3366 Center Grove Drive Suite 4
Dubuque, IA 52003
563-239-1931

Connect With Us

  • Facebook

Services

  • Car Audio
  • Custom Installation
  • Marine Audio
  • Remote Starters
  • Safety Cameras

Store Hours

Monday, Tuesday, Wednesday, Thursday, Friday10:00 am – 5:00 pm

Copyright © 2025 5Sixty3 Sound · Privacy Policy · Website by 1sixty8 media · Log in


Loading Comments...